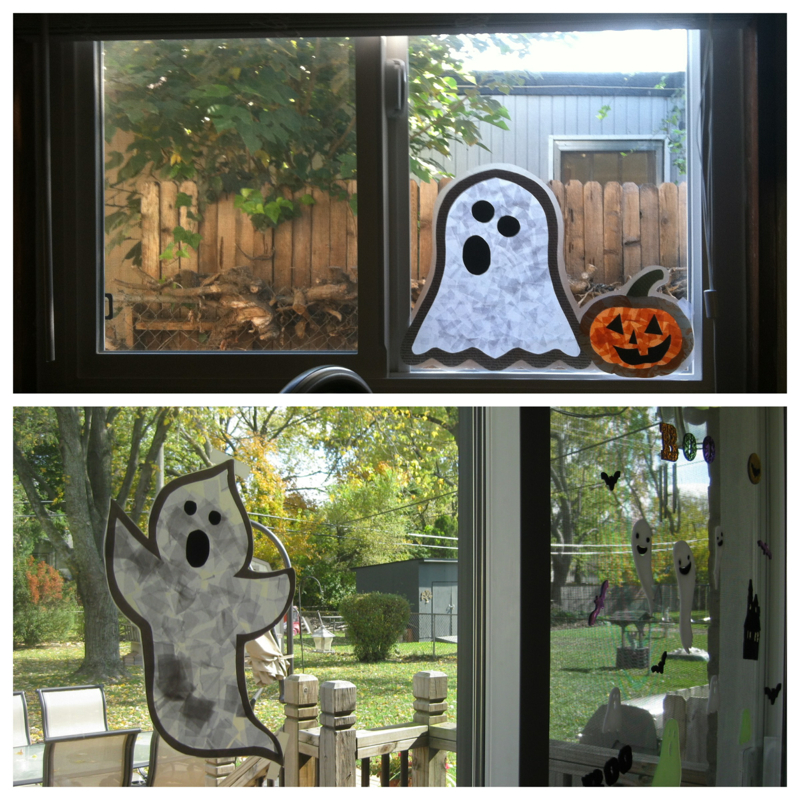
This past weekend my two favorite little ladies, Maecy & Maddie, were busy working on Halloween projects. What a fun, cute, and mess free Halloween project for kids these turned out to be! Bonus, you probably have most of the materials needed in your house already. The girls also made a few extras to give away as gifts, the grandparents were of course excited.
Below are some instructions and tips from Candi;
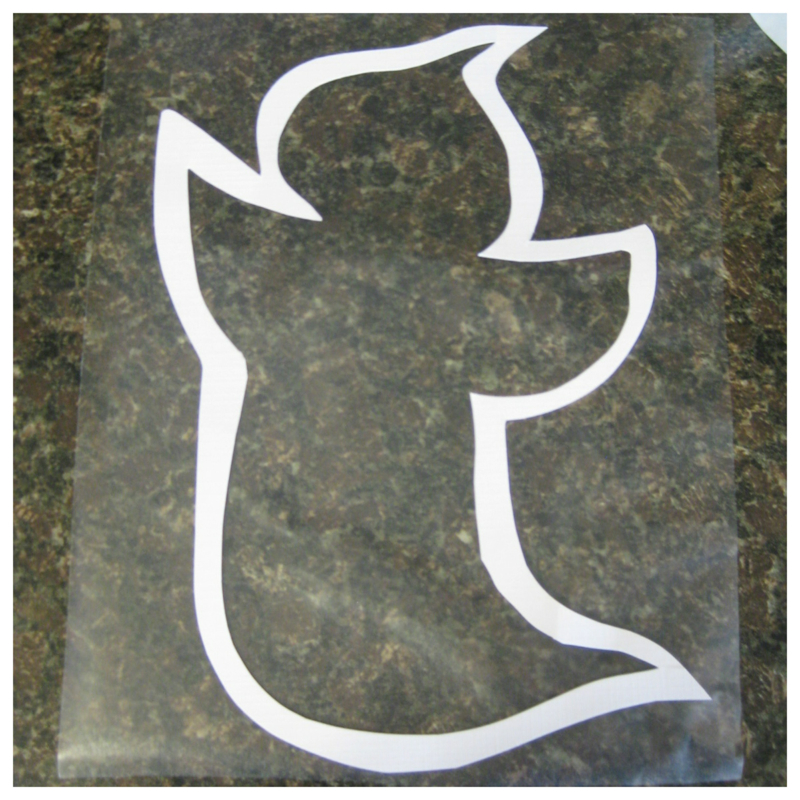
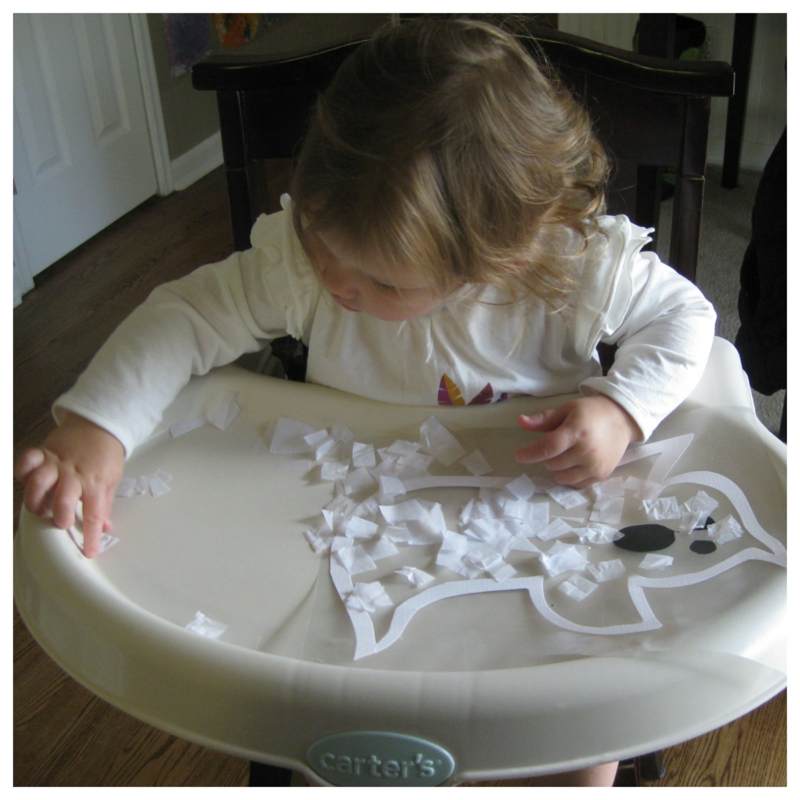
Tissue Paper, Stained Glass Ghosts
- Clear Contact Paper (we found ours at the local hardware store, Ace)
- White & Black Card Stock (12 x 12 white for a larger ghost)
- White tissue paper, cut into small squares.
1. Cut out your ghost outline using the white cardstock. The cut out the inside of your ghost.
2. Cut out your ghost face using the black cardstock.
3. Lay a piece of contact paper (big enough to fit your ghost with room for cutting on sides) on a flat surface and remove the back, sticky side up.
4. Place your ghost onto the contact paper, then position your face where you would like.
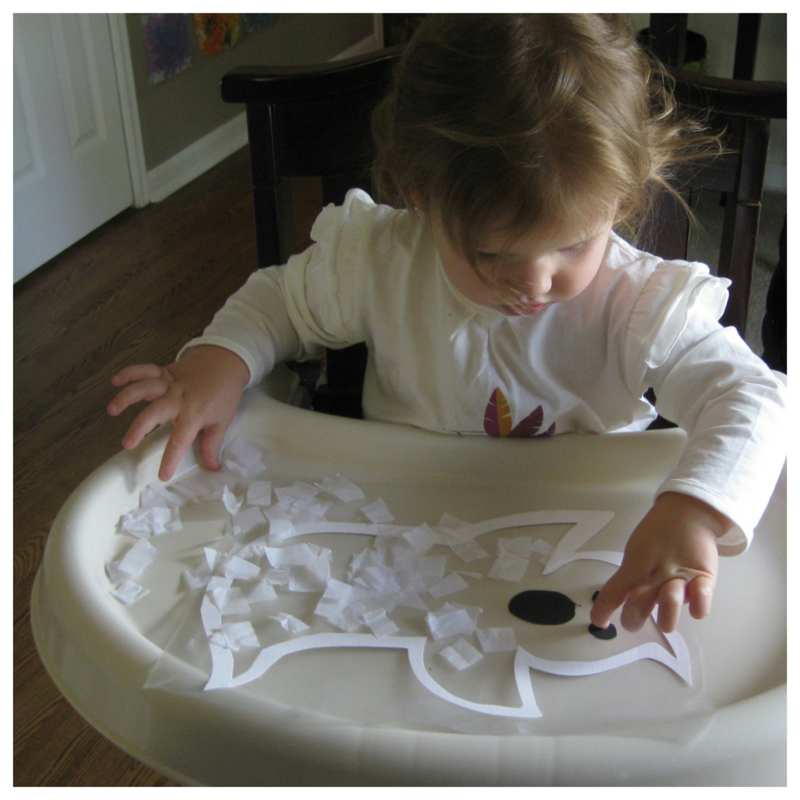
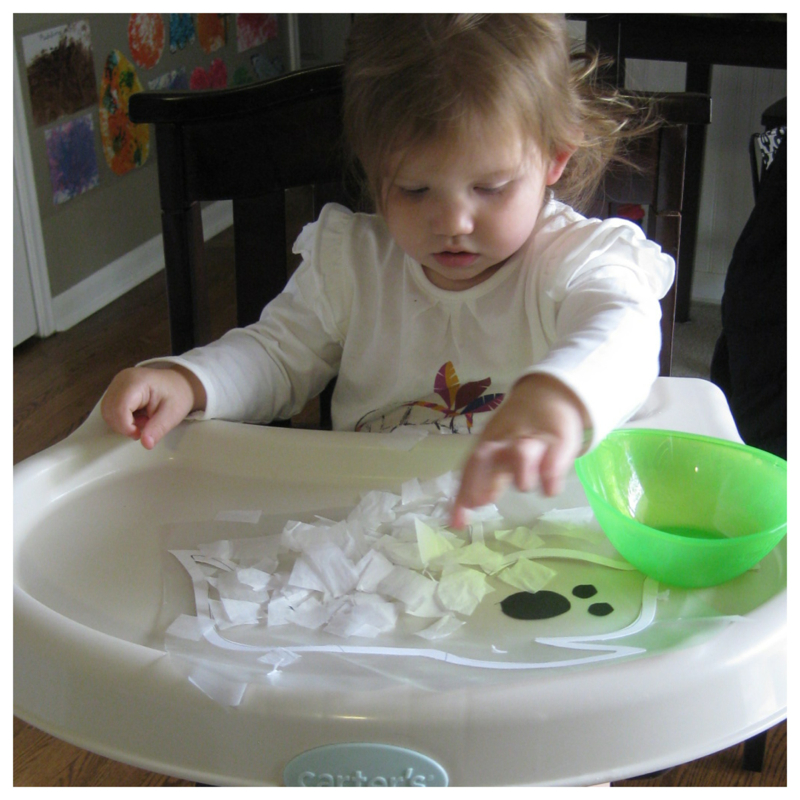
5. Fill in the ghost using the tissue paper squares.
6. Cut a second piece of contact paper to cover the back of your ghost. Remove the backing and attach to the back of your ghost, sticky side down. This works best by starting in the center and smoothing outward in both directions.
7. Finish by cutting along the outline of the ghost to remove extra contact paper.
Tips from Candi:
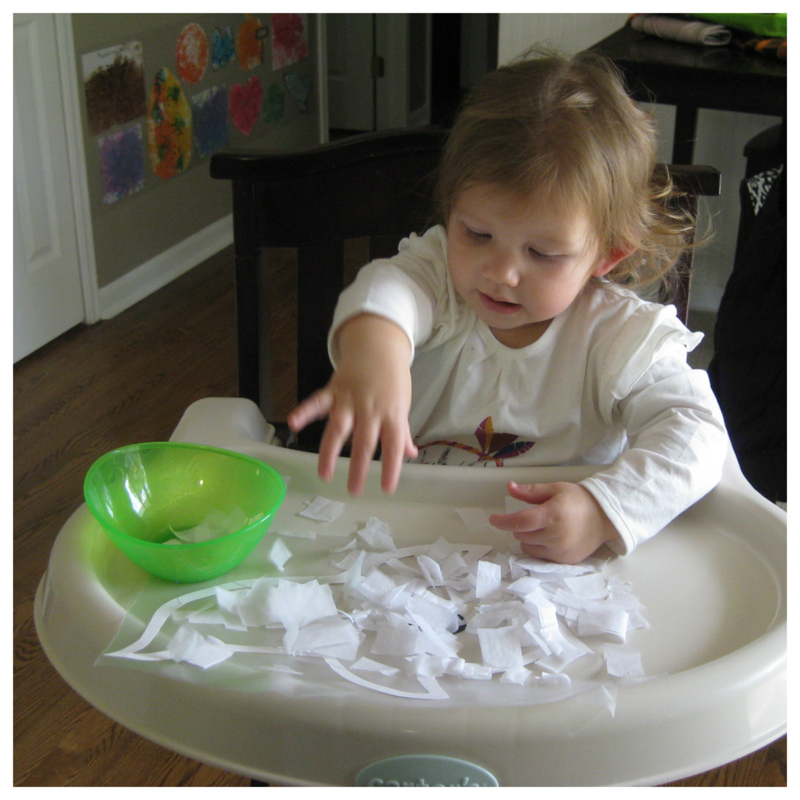
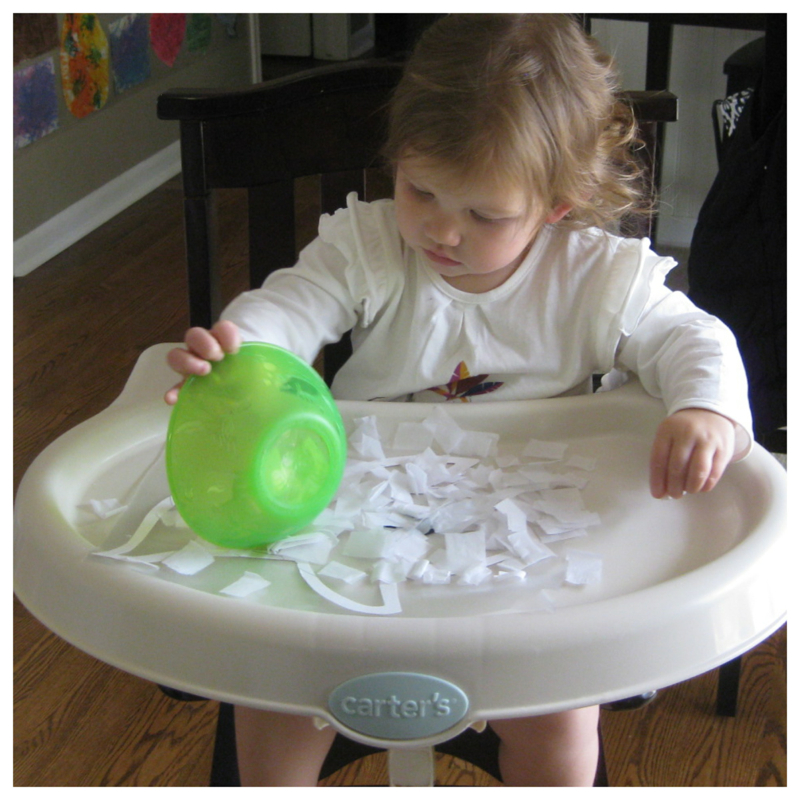
The first time, I put cut up tissue paper on Maecy's tray with her ... thennnnn.... to try and get more of the ghost covered (because in our house - I don't just do the art for her!) I filled up one of her small bowls with the tissue paper squares. What toddler doesn't love dumping stuff? She loved tossing handfuls on there and then dumping the entire bowl, it filled up the ghost nicely! She even helped me sweep the floor after with all the extras that had dropped. We are going to do some bats and pumpkins next.
Below are some instructions and tips from Candi;
Tissue Paper, Stained Glass Ghosts
- Clear Contact Paper (we found ours at the local hardware store, Ace)
- White & Black Card Stock (12 x 12 white for a larger ghost)
- White tissue paper, cut into small squares.
1. Cut out your ghost outline using the white cardstock. The cut out the inside of your ghost.
2. Cut out your ghost face using the black cardstock.
3. Lay a piece of contact paper (big enough to fit your ghost with room for cutting on sides) on a flat surface and remove the back, sticky side up.
4. Place your ghost onto the contact paper, then position your face where you would like.
5. Fill in the ghost using the tissue paper squares.
6. Cut a second piece of contact paper to cover the back of your ghost. Remove the backing and attach to the back of your ghost, sticky side down. This works best by starting in the center and smoothing outward in both directions.
7. Finish by cutting along the outline of the ghost to remove extra contact paper.
Tips from Candi:
The first time, I put cut up tissue paper on Maecy's tray with her ... thennnnn.... to try and get more of the ghost covered (because in our house - I don't just do the art for her!) I filled up one of her small bowls with the tissue paper squares. What toddler doesn't love dumping stuff? She loved tossing handfuls on there and then dumping the entire bowl, it filled up the ghost nicely! She even helped me sweep the floor after with all the extras that had dropped. We are going to do some bats and pumpkins next.

 RSS Feed

